
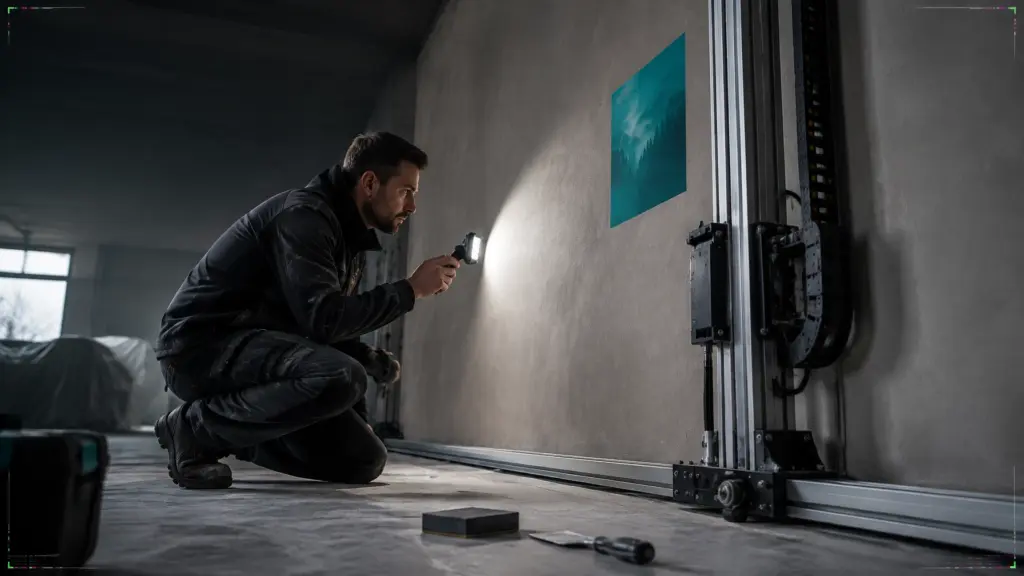
A great wall print starts before the first drop of ink. The surface needs to be sound, clean and suited to the design, so the artwork can reproduce with clarity and stay looking its best.
Direct-to-wall printing can work across a range of materials, from painted plaster to brick, wood and glass. But “printable” does not mean every surface is ready without preparation. The wall’s condition, texture and colour all affect the finished result.
Here’s what to check before printing, and how to get your wall ready.
Start with a sound, dry surface
The most important factor is not the wall’s name. It is the condition of the surface the ink will meet.
Before printing, check that the wall is:
- Firm: no loose plaster, flaking paint or crumbling mortar.
- Dry: no active damp, water ingress or mould.
- Clean: free from dust, grease, soot, wax and cleaning residue.
- Stable: with cracks, holes and loose sections repaired.
- Within the printer’s working limits: major bumps, deep grooves and obstructions may affect setup.
Direct-to-wall printing applies the image to the surface itself. If paint or plaster is loose, the print cannot make that layer stable. Fix the underlying issue first, rather than printing over it.
Moisture needs particular attention. Printing is not a solution for damp, and a wall should be fully dry before work begins. If the cause of damp is unclear, arrange for it to be assessed before planning a print.
Which surfaces work best?
A smooth, firm, light-coloured wall is usually the easiest starting point. Other surfaces can also work, but may need extra preparation or a conversation about how texture will influence the artwork.
Smooth, painted plaster
Clean, well-bonded paint on a reasonably smooth wall often gives a crisp, consistent finish. It is a strong choice for detailed images, fine lines and text.
Look for peeling, chalky areas, dents or ridges. Fill and sand imperfections, remove the resulting dust, and make sure any repairs are finished and stable. If the wall has been freshly painted, allow the coating to dry and cure in line with the paint manufacturer’s instructions before printing.

Brick and textured masonry
Brick can bring real character to a printed wall. The artwork sits on the surface, so the texture remains visible rather than being covered by a paper layer. This can suit feature walls in homes, hospitality spaces and commercial interiors.
The trade-off is that texture affects detail. Deep mortar joints, pronounced ridges and uneven faces can interrupt fine lines or small text. Bold shapes, larger lettering and artwork with less intricate detail are often better suited to heavily textured walls.
Loose dust, flaking material and crumbling mortar should be addressed before printing. Depending on the wall, sealing or other preparation may also help create a more even base. The right approach is assessed on the actual surface, not assumed from a photograph alone.

Wood and timber
Wood can provide a distinctive base for artwork, but its finish and absorbency matter. Bare or porous timber may take ink differently from a sealed or painted panel. Grain, joints and changes in level can also affect how the image reads.
Preparation may include cleaning, light sanding and applying a suitable primer or sealer, depending on the material and finish. Painted, varnished or very smooth wood should be checked for compatibility before printing. A small test can help assess colour and adhesion where the surface history is uncertain.
Glass and other smooth surfaces
Glass can be used for printed graphics, but its smooth, non-porous finish calls for a different assessment from plaster or brick. Cleanliness is critical: fingerprints, silicone and cleaning residue can interfere with adhesion. A compatible primer or adhesion treatment may be required, depending on the glass and printing system.
Tiles, metal and other non-porous surfaces also need an individual check. Tell your printer exactly what the surface is and whether it has been coated or treated. A test patch can help confirm how the print behaves before committing to a larger area.
Texture changes the look of the artwork
A wall does not always need to be perfectly flat. Direct-to-wall printing can suit some textured surfaces, but texture remains part of the finished image.
A shallow, even texture may add character. A deep or irregular surface can soften fine detail and affect the distance between the print head and wall. That makes artwork choice important: photography, small type and delicate linework may need a smoother area, while a bolder graphic may work well on brick.
Printer capabilities vary. Some machines can compensate for a degree of surface variation, but the limits depend on the specific equipment and setup. For example, wallPen’s machine FAQ provides guidance for its own system; those specifications should not be treated as universal limits for every printer.
At Pixel Perfection, we assess the wall and design together. Our direct-to-wall printing service is designed for a range of interior surfaces, including plaster, brick, painted walls, wood, glass and textured finishes.
Prepare the wall: a practical checklist
Use this sequence before your print is scheduled:
- Inspect the whole print area. Check for cracks, holes, loose paint, damp patches and protruding fixtures.
- Repair defects. Fill holes and cracks, secure loose material and sand high spots where appropriate.
- Remove dust and residue. Clean the surface with a method suitable for its material, then allow it to dry fully.
- Prime where needed. Porous, chalky, repaired, dark or non-porous surfaces may require a compatible primer or sealer.
- Confirm the base colour. A pale, even background generally gives more predictable colour. A dark or strongly coloured wall can influence the appearance of the artwork.
- Share the details. Tell your printer about recent paintwork, repairs, coatings, texture and any history of damp.
- Agree a test if necessary. Where the surface or coating is uncertain, a small test print can help assess the result before the full design is printed.

Colour starts with the wall beneath it
Wall printing does not hide the base colour in the way an opaque sheet might. The wall can influence how the artwork appears, particularly where colours are pale or subtle.
A uniform light-coloured surface typically offers the most predictable starting point. If your wall is dark or strongly coloured, discuss whether a suitable base coat or another approach is needed. Likewise, patched areas can absorb or reflect light differently from the surrounding paint, so spot repairs may need priming to create a more consistent finish.
This is worth considering when you’re preparing a branded wall, a photographic mural or artwork with light tones. Our custom mural printing guide explains how a design can be scaled to suit the wall; the wall’s colour and condition are part of that planning.
What to send for an initial assessment
You do not need to diagnose every surface issue yourself. A few clear details can help your printer understand the job and advise on next steps.
Share:
- Approximate wall width and height.
- A straight-on photo of the wall, plus close-ups of any texture or damage.
- The surface type, such as painted plaster, brick, timber or glass.
- Any known history of damp, repairs or recent painting.
- Your artwork or an outline of the result you have in mind.
Photos help start the conversation, but an on-site assessment may be needed to confirm the wall’s condition and printer access. Pixel Perfection provides mobile wall printing across West Sussex and Sussex, with artwork preparation and scaling available to match the design to your dimensions.
From blank surface to finished feature
The best results come from pairing the right artwork with a stable, prepared wall. Smooth painted plaster is often the simplest surface to work with; brick, timber and glass can also be suitable when their specific needs are considered.
A careful check before printing helps avoid surprises and gives your design the right foundation. If you’re planning a feature wall at home or branded artwork for a commercial space, send us your wall dimensions, a photo and your idea. We’ll help you understand what preparation may be needed and how to move from concept to print.